...
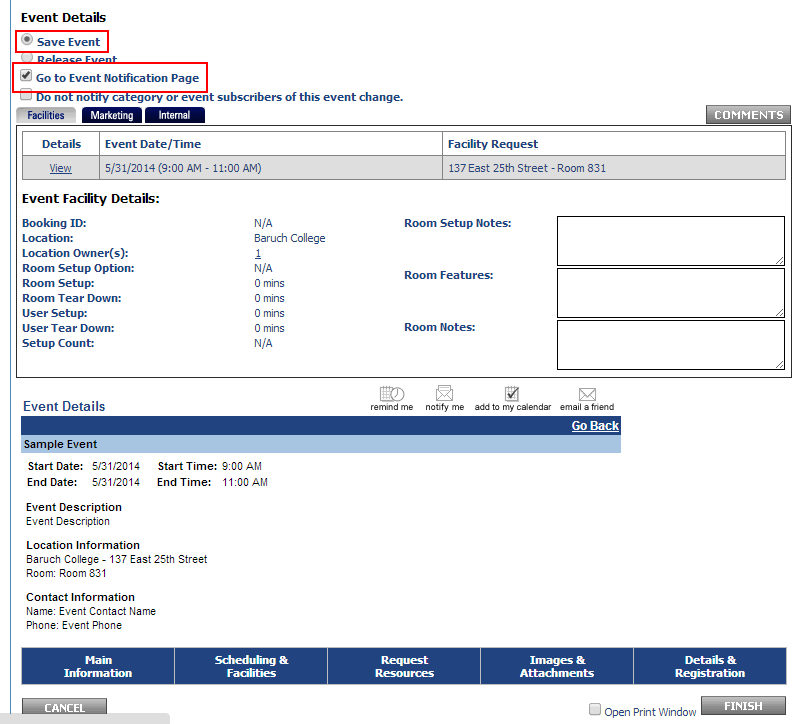
- If you have your rate category set to "TBD by Dean or VP", make sure your event is set to "Save Event" and check off "Go to Event Notification Page". Then click "Finish".
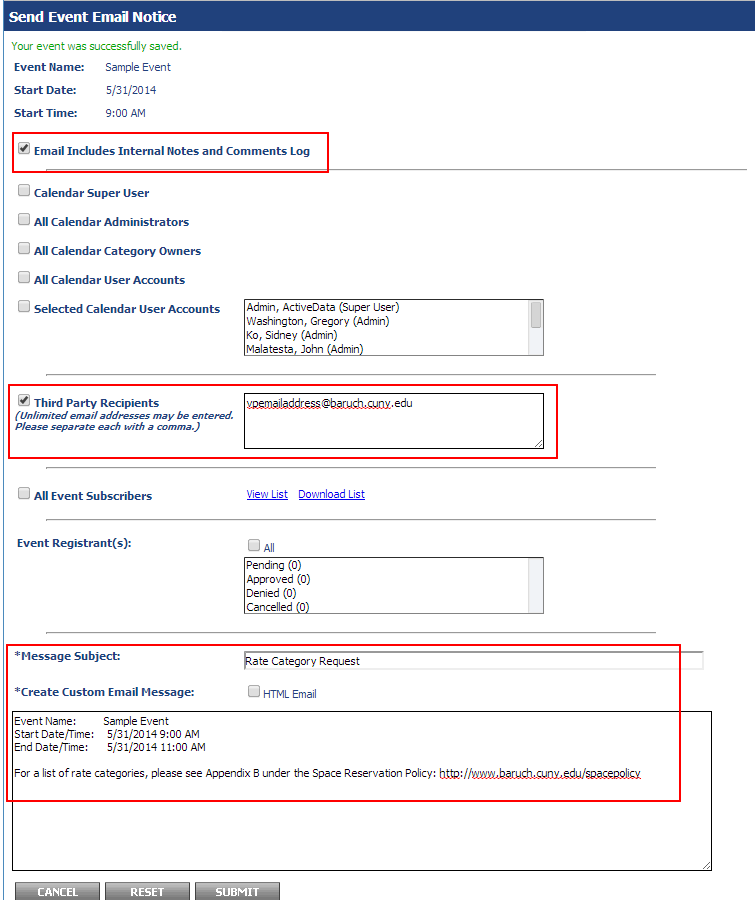
- This will bring you to the "Event Notification" page. On this page, select "Email Includes Internal Notes and Comments Log" and "Third Party Recipients" where you will enter your Dean/VP's email address. Enter "Rate Category Request" for the subject and any additional information into the body of the message then click "Submit".
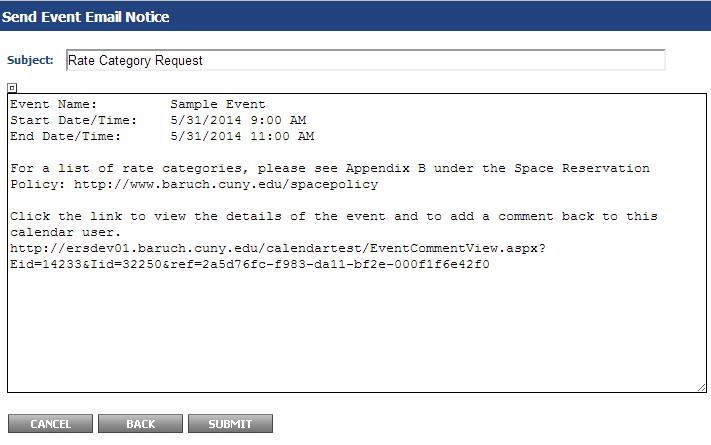
- The following screen will show an overview of the message. Click "Submit" to send the notification to your Dean/VP.
- You are done with the event for now. The Dean/VP will either send you the rate category through email or via the comments of your event (Please see the Space Reservation Workflow - Step 3), where you will then modify your event, put in the rate category, and then select "Release Event" and "Finish" in order to make the facility request to the Space Manager.
If you do not know how to modify your event, see the section below.
...
- In the calendar service, click the "Events" tab
- Click "Events: Modify/Cancel/Delete".
- Select the event from the left-hand list and click "Submit". You can also double-left click the event you wish to modify. If you do not see the event, use the keyword search on the right if you know the event name.
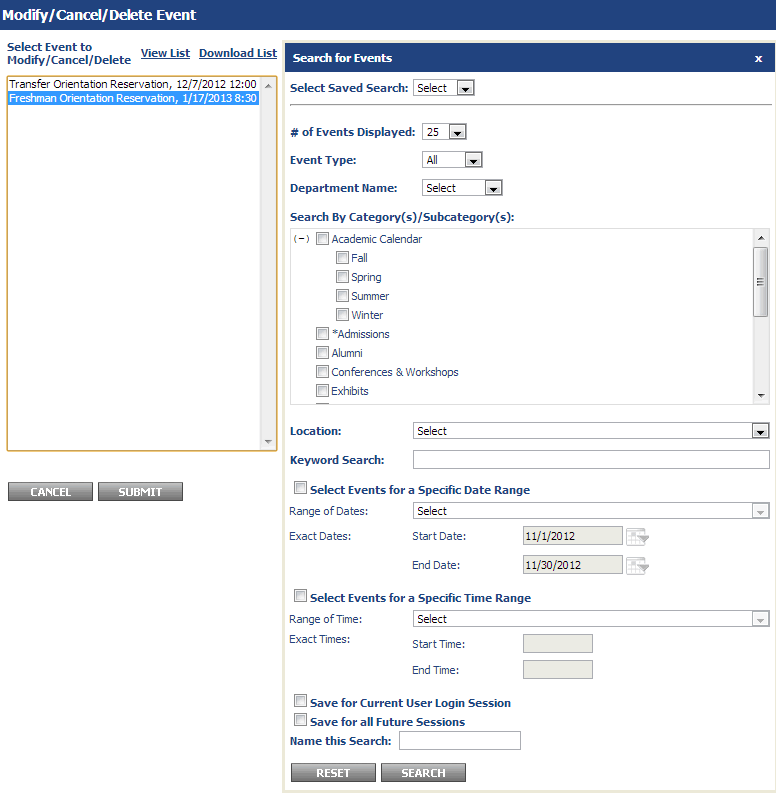
Other useful search options:
Select Events for a Specific Date Range - You can specify the start/end date to show events during this time period.
Save for Current User Login Session - If you expect to modify the same set of events during your current session within the Calendar, saving this will prevent you from having to search for it again for the duration of the session.
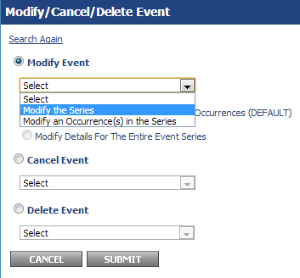
Save for all Future Session - If you expect to use this search again in the future, you can save the search by selecting this option and putting in a name for the search. In the future, you can access the same search by using the drop-down menu by "Select Saved Search". - If you have more than one occurrence in your event (more than one event date), you will see the screen below. You can modify the series or an individual occurrence of the event. When you've selected which set you'd like to modify, click "Submit".
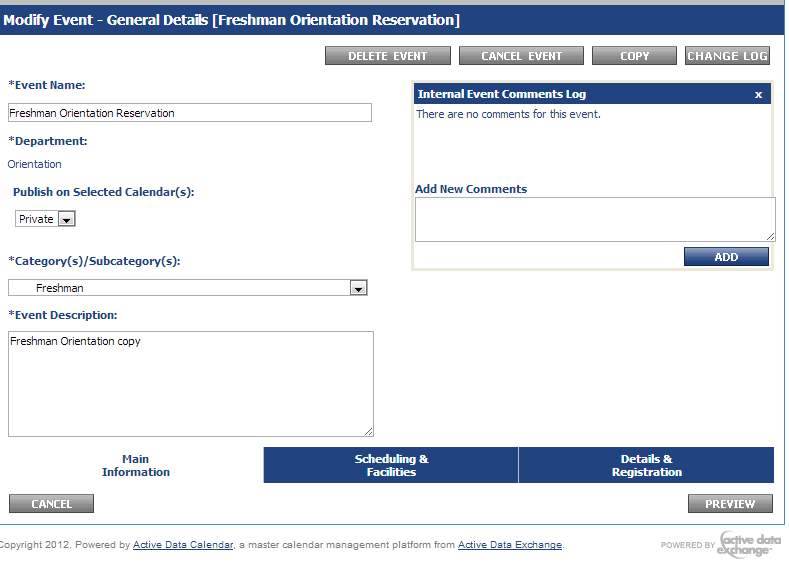
- Modifying the event is similar to adding an event. You can proceed through the tabs and make edits where needed. If you wish to delete or cancel an event, you can select these options on the first tab shown in the image below. When you're done with your edits, just click "Preview" and you can save or release the event.
Removing a room from an event
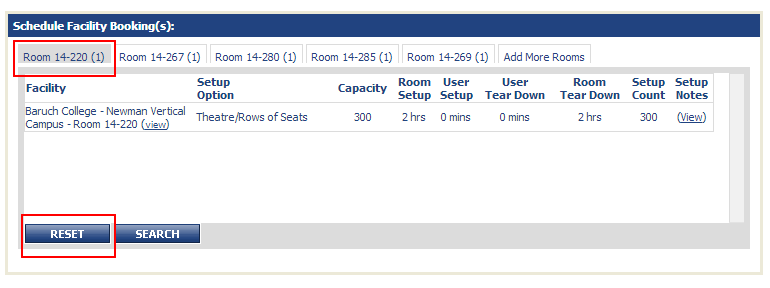
If you wish to remove a room from an event date, you will click on the "Scheduling & Facilities" tab at the bottom of the page.

Scroll down to the bottom of the page where you will see the "Schedule Facility Booking(s)" area. Click on the room (the tab) you wish to remove and then click "RESET". The room will then be removed. Make sure to click "Preview" and then "Finish" at the bottom right of the screens to finalize your changes.
If you have multiple dates using the room that is being removed, you should modify the occurrence date where the room is not needed and follow the instructions above. You can select an occurrence by following the instructions from the above section "Modify/cancel/delete an existing event"
Changing/Removing Event Date(s) or time for an Event
IMPORTANT - Changing the event date/time for an event date where the room has already been approved will require the Space Manager to approve/deny your request again. The room will be available for others to request until the Space Manager approves your request.
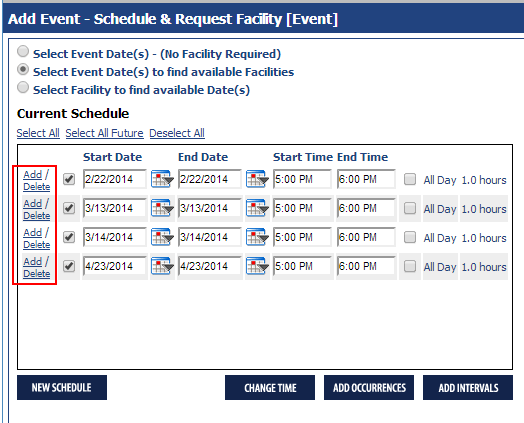
If you wish to change/remove an event date or time for your event, you will click on the "Scheduling & Facilities" tab at the bottom of the page.
You may make your changes on the "Current Schedule" table. If you need to remove a date, you can click the "Delete" link next to the date. Don't forget to click "Preview" and then "Finish" to finalize your changes.
Modifying Events with Registration / Active Registrants
...