Logging into the calendar
- Go to http://www.baruch.cuny.edu/calendar/ or click “Calendar” from the Baruch homepage
- Click “Submit Events”
- Click “Administrative login”
- The username/password is the same as the one you use to login to the computer (Active Directory)
Adding an event to the private calendar (Private calendar users only)
- In the calendar service, click the "Events" tab
- Click "Events: Add".
- Fill out the event name.
- Select "Private" for "Publish on Selected Calendar(s)
- Select the private category/subcategory that is available to you under "Category(s)/Subcategory(s)"
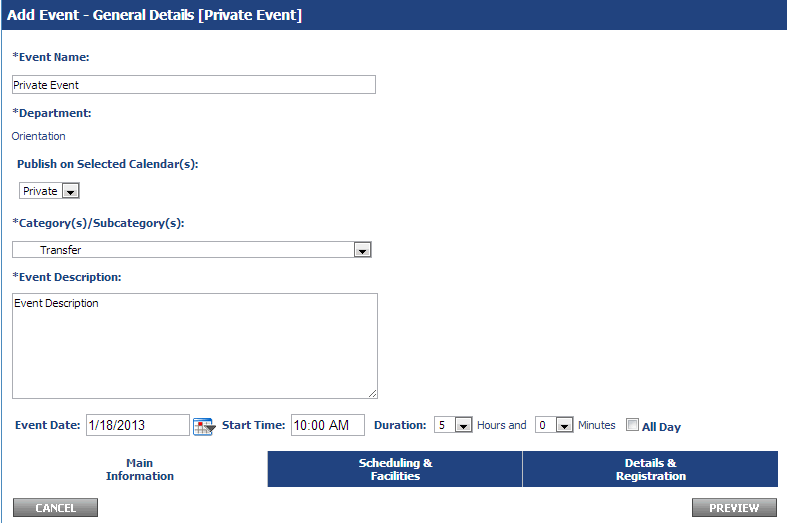
- Fill out the event description
- For the event date, start time, and duration, you can opt to fill it out here or in the next screen under "Scheduling & Facilities".
- Click the next tab "Scheduling & Facilities" to proceed to the next screen.
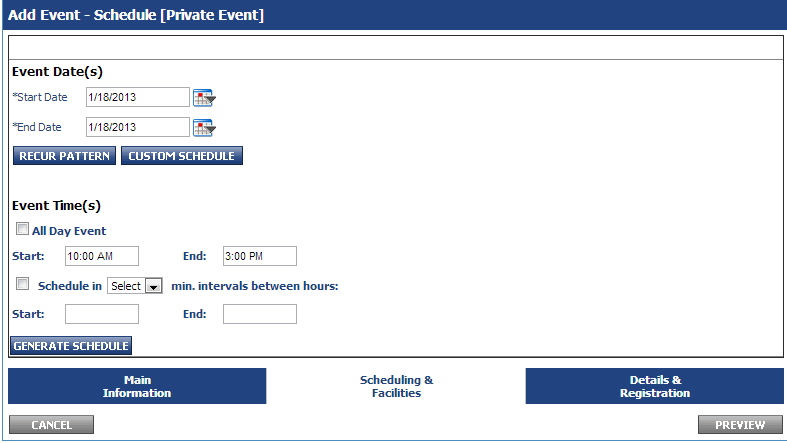
- If you filled out the event date, start time, and duration, you will find it populated on the screen here. If you opted not to, fill it out the Start Date / End Date fields and the Start and End times under "Event Time(s)".
- If you have multiple occurrences of the event (for instance, five open houses with identical event titles/descriptions), click "Custom Schedule" and select the dates.
- When you are done with steps 9 and/or 10, click "Generate Schedule". This will update the screen and allow you to select a location for the event.
If you have multiple occurences (event dates), you can select a different location for each event by checking off each event that will be using the same room and proceeding with the steps (12-13) below.
The example image below would allow me to select a location for the 1/19/2013 event.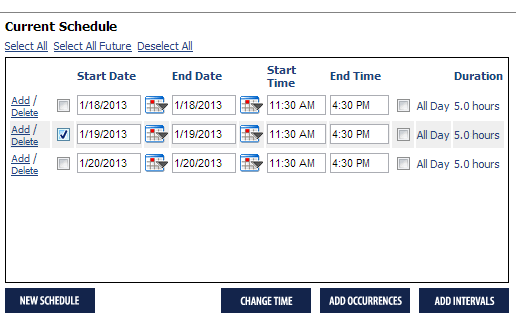
- Midway through the page, you should see a Location/Building/Room(s) checkbox list. Only check off the room that the event is on. If there is no specific room for the event, then check off the building. If the room the event is in is not listed, please submit a request to the BCTC Help Desk to add it.
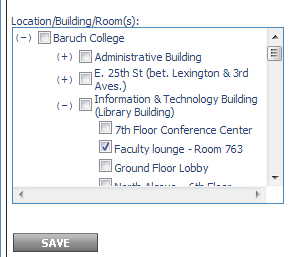
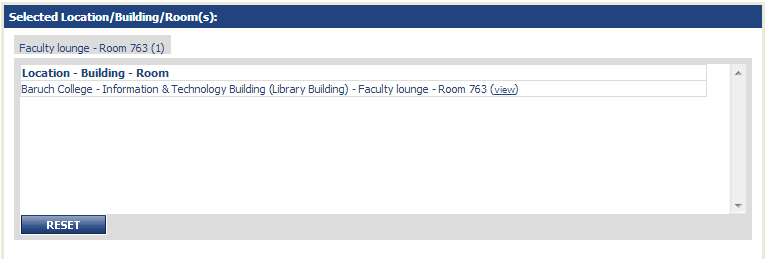
- Once you've selected the location. Click "Save". Upon saving, the location should be reflected similar to the image below.
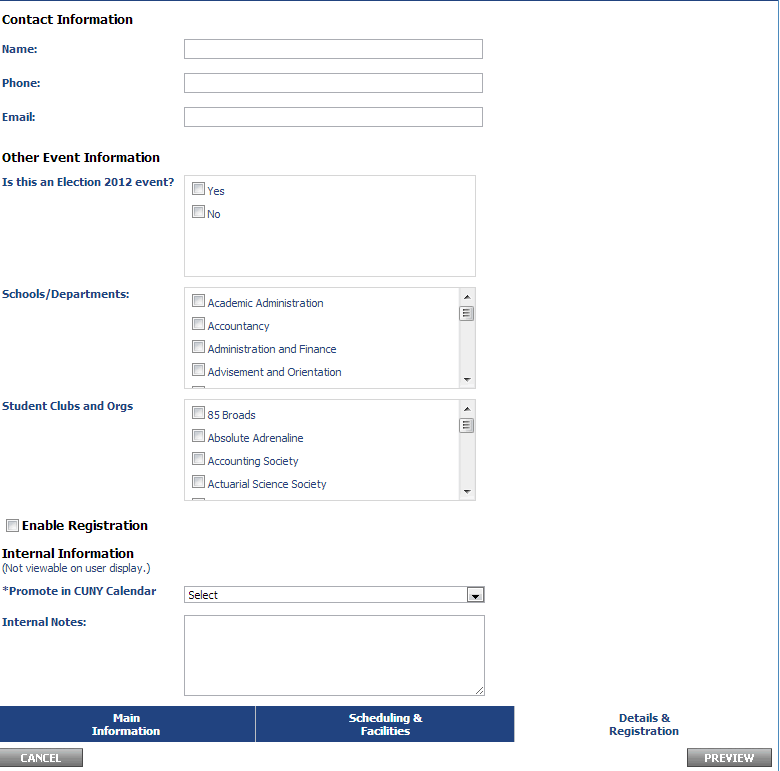
- Click on the next tab "Details & Registration"
- For the private calendar, you will only need to fill out the contact information and select "No" for the "Promoted in CUNY Calendar" field.
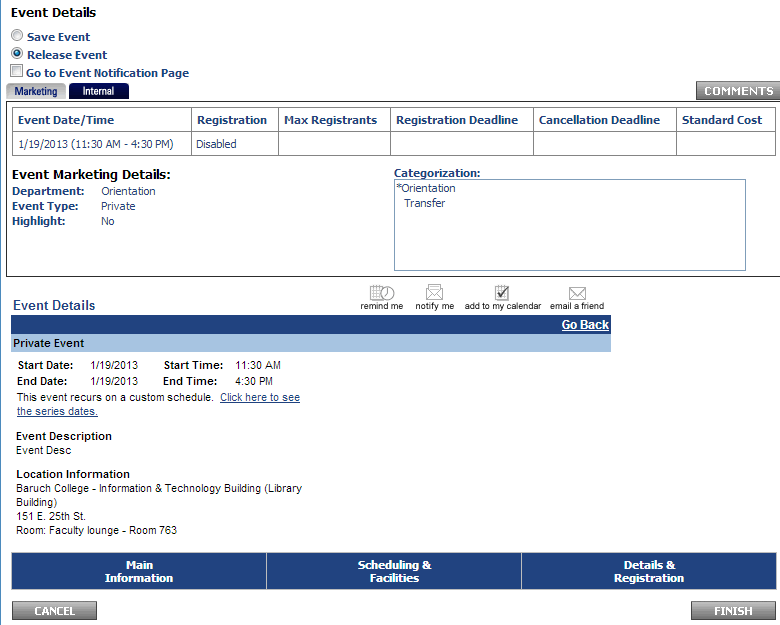
- Click "Preview"
- On the preview screen you can opt to save the event or release the event. If you save the event, it will not be published to the calendar and will only be viewable in your account. If you release the event, it will go into the calendar. The event details area shows a preview of what your event looks like in the calendar.
- Select save or release event and then click "Finish".
Modify/cancel/delete an existing event
- In the calendar service, click the "Events" tab
- Click "Events: Modify/Cancel/Delete".
- Select the event from the left-hand list and click "Submit". If you do not see the event, use the search on the right.
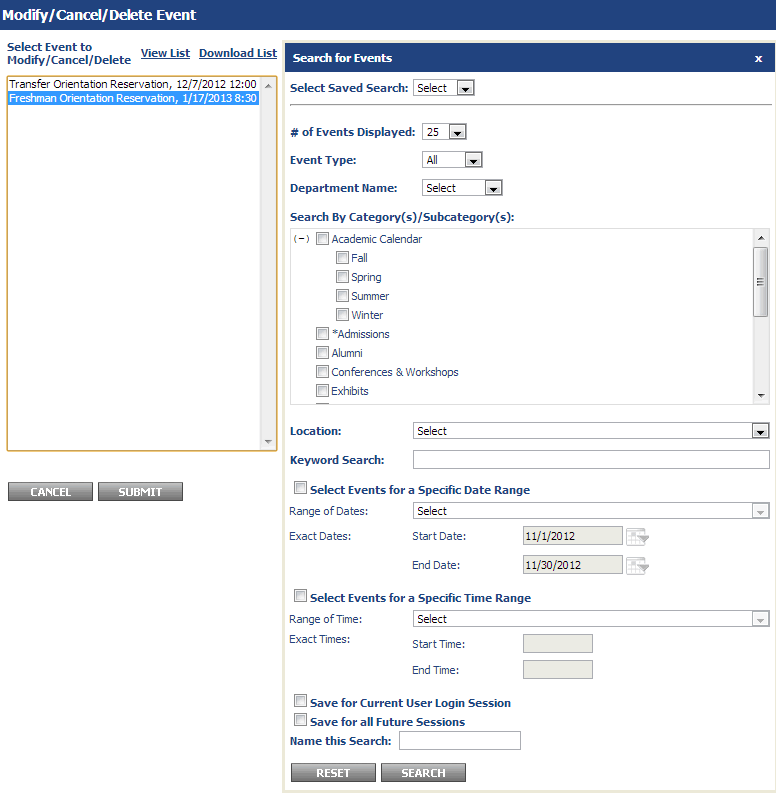
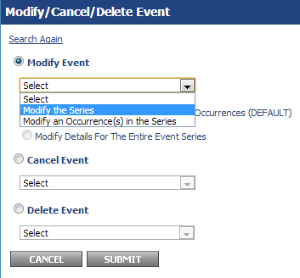
- If you have more than one occurrence in your event, you will see the screen below. You can modify the series or an individual occurrence of the event. When you've selected which set you'd like to modify, click "Submit".
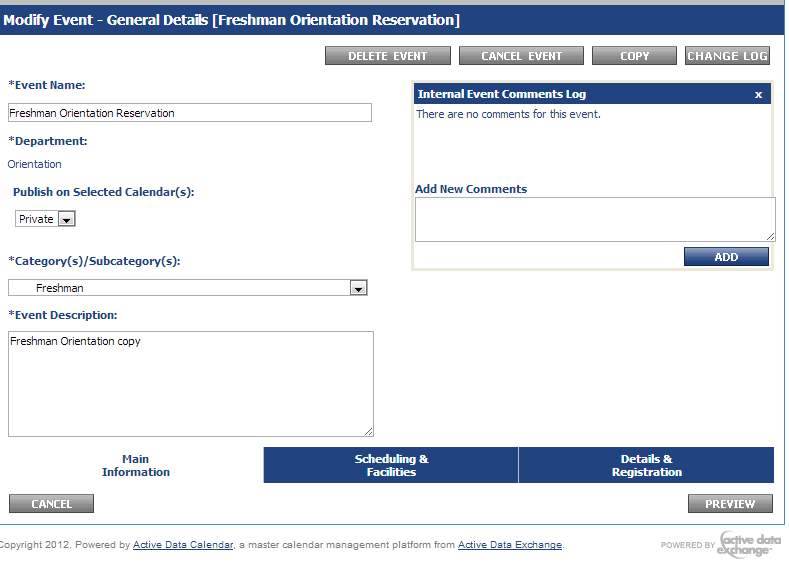
- Modifying the event is similar to adding an event. You can proceed through the tabs and make edits where needed. If you wish to delete or cancel an event, you can select these options on the first tab shown in the image below. When you're done with your edits, just click "Preview" and you can save or release the event.
Add Registration to an Event
If you would like to add a registration form to the event, please follow the steps below.
- On the "Details & Registration" tab, you should see an "Enable Registration" checkbox. If you do not see this, make sure that your event date is set correctly. If it is in the past or day of, it will not allow you to set registration. Check off "Enable Registration" and the options below should appear.

- For "Registration Form Template", it is advised to set up your own template as this allows you to control the different options of the form. The standard form has a set of options that cannot be changed. The options are noted in the list below. If these options are satisfactory, then select "Use Standard Form" as the registration form template.
- The standard form sets all registrants to "pending" which means you will have to go into the system and manually approve people who have registered for the event.
- The standard form emails the user who created the event with a notification every time someone registers for the event
- The standard form only asks for the user's first name, last name, and email address.
- For "Registration Rules", this only applies to an event with multiple occurrences (for example, an open house event that occurs every two weeks with registration). The following options are available:
- Single Occurrence Level Registration Only Enforced - a registrant can only register for one occurrence (can only attend one open house)
- Multiple Occurrence Registration Allowed - a registrant can register for all open house events
- Make sure to set the following fields as they are required
- Maximum Registrants - Check unlimited if you do not want a limit
- Registration Deadline
- Cancellation Deadline - When the user registers for an event, they also receive a link to cancel their registration. This will set a deadline for allowing cancellations
- You can also set the event to display if registration spaces are still available. Setting it to yes will show how many spaces are still available.
- You can ignore the "Additional Registrant Information" as this is not normally used.
- The registration portion is done, you can proceed with other event changes or click "Preview" and finalize the event.