...
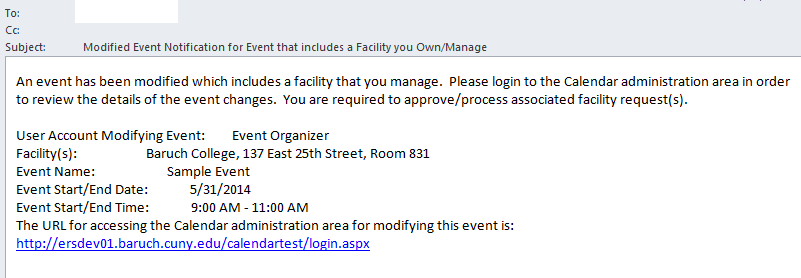
- Facility owner will receive an email indicating a facility request for an event with event details in message.
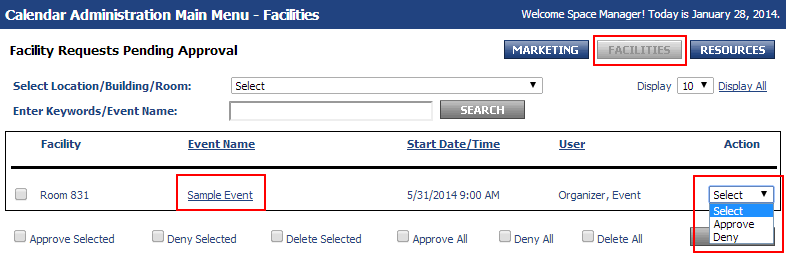
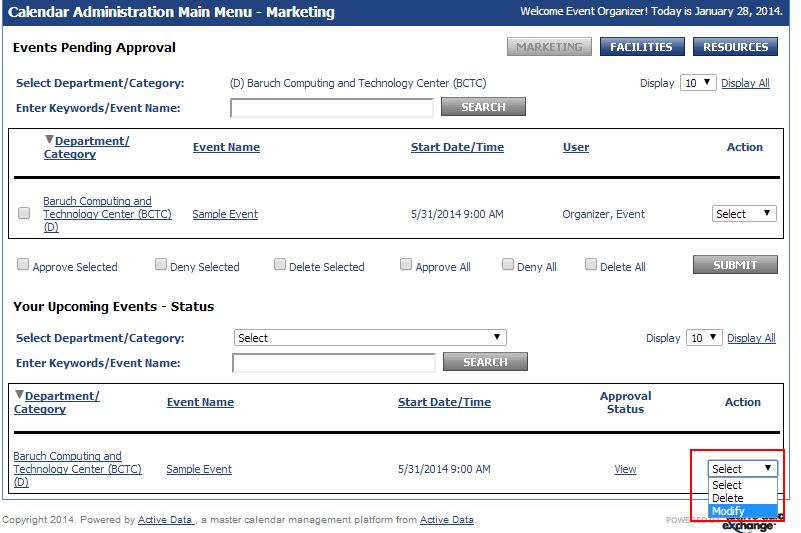
- Click on either the "Event Name" link to go into further detail for the event or select "Approve" or "Deny" from the Action drop-down for instant approval/denial.
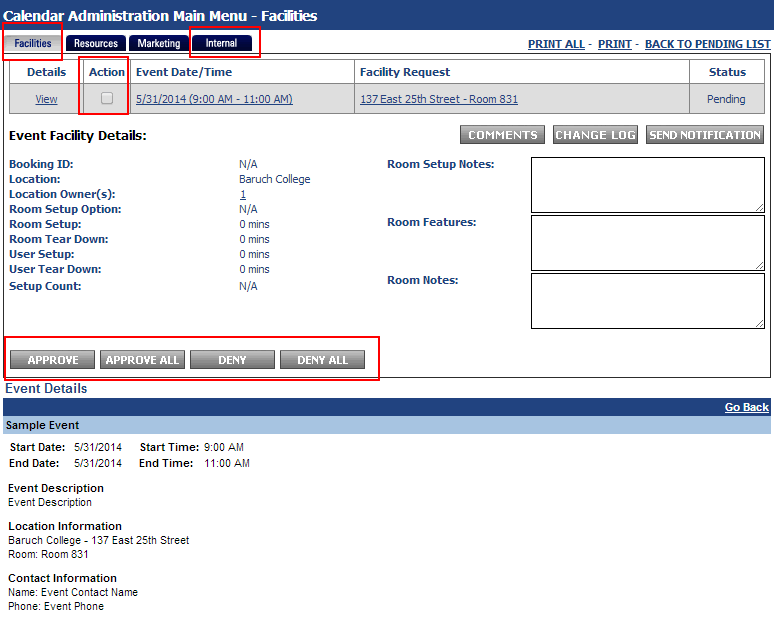
- If you click on the "Event Name" link, you will see an overview of the event with options to approve/deny the event.
- If you deny the event, you will receive a prompt to indicate the reason for denial. The event sponsor will receive a message indicating the request was denied and will have to restart the facility request process.

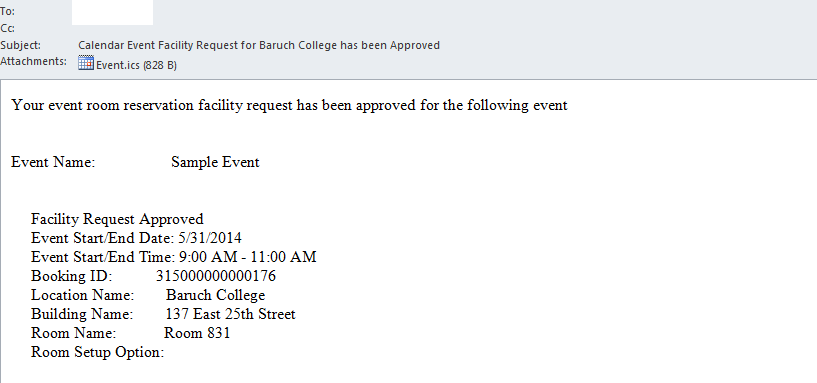
- If you approve the event, the event will be published into the calendar. The event sponsor will receive a message indicating the request was approved.
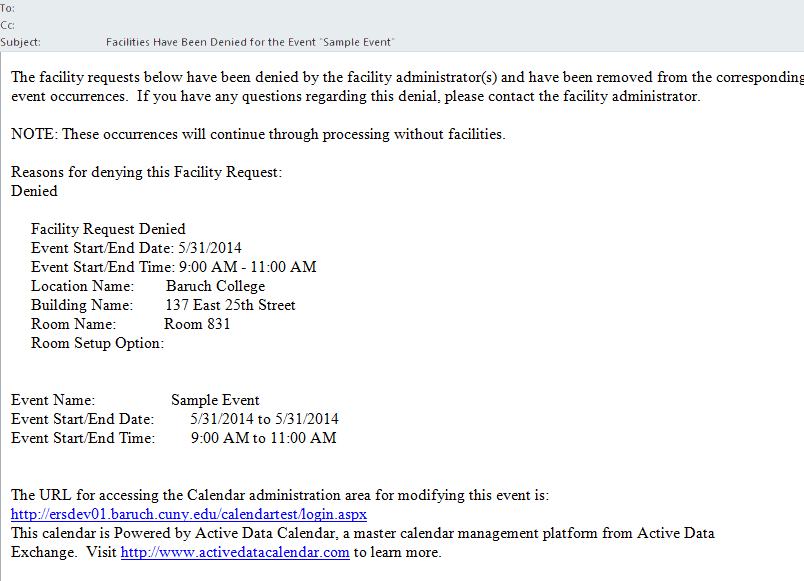
Event Sponsor - If your event has been denied
- If your event has been denied, you will receive the following email:
- Log into your account or click "Main Menu" if already logged in. Access/modify your event by clicking action and selecting modify. Please take care if using this method to edit the event as accidentally selecting delete and clicking off of the drop-down menu will delete your event with no confirmation. You can also access/edit the event through the traditional method by clicking "Events: Modify/Cancel/Delete" and finding your event on the list.
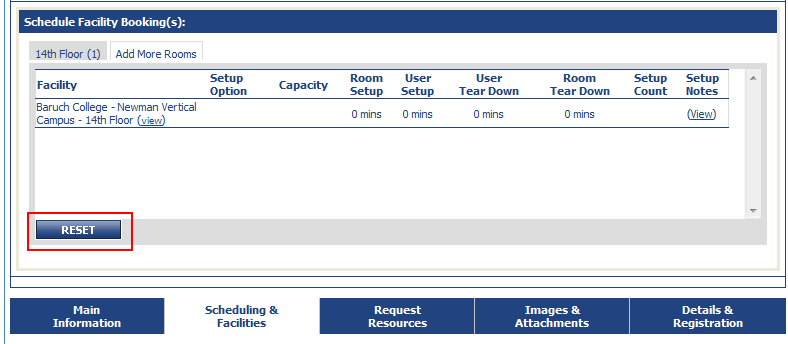
- Proceed to the "Scheduling & Facilities" tab. Scroll to the bottom until you see "Schedule Facility Booking(s)" and click "Reset" to remove the denied facility. Proceed with your new facility request and release the event for the facility owner to approve.