...
- In the calendar service, click the "Registration" tab
- Click "Registrants: Active". You will see the screen below.

- If you wish to get a CSV export with the registrants, click "Download" on the right side of the screen for the event.
- If you click the link with the number of maximum registrants, this will allow you to increase registrants for this event.
- If you click the link with the number of pending, approved, denied, or cancelled registrants, this will show you a list of registrants with the specified status for that event. This screen is shown below.
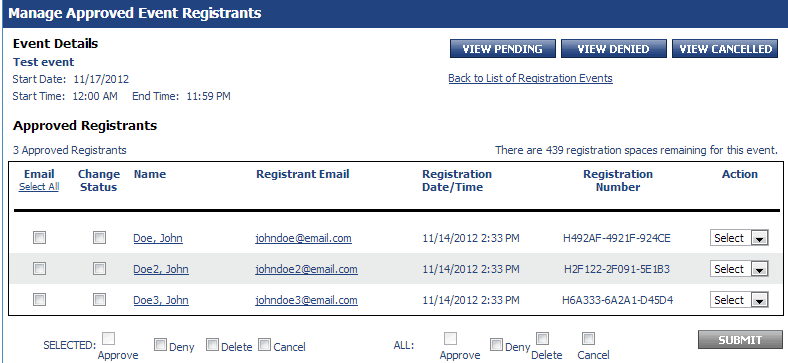
- To change the status of only one registrant, click the drop-down menu under "Action" for the individual's row and select an action (approve/deny/delete/cancel). After selecting the action, the calendar service will automatically perform the given action.
- To change the status for multiple individuals, but not all, check the "Change Status" checkbox next to their name. Then click the action (approve/deny/delete/cancel) next to "SELECTED:". Click "Submit".
- To change the status for all listed, click the action (approve/deny/delete/cancel) next to "ALL:". Click "Submit".
- To email registrants, either click "Select all" if you wish to email all registrants or click the individual's checkbox under "Email". Click "Submit". The email screen is shown below.
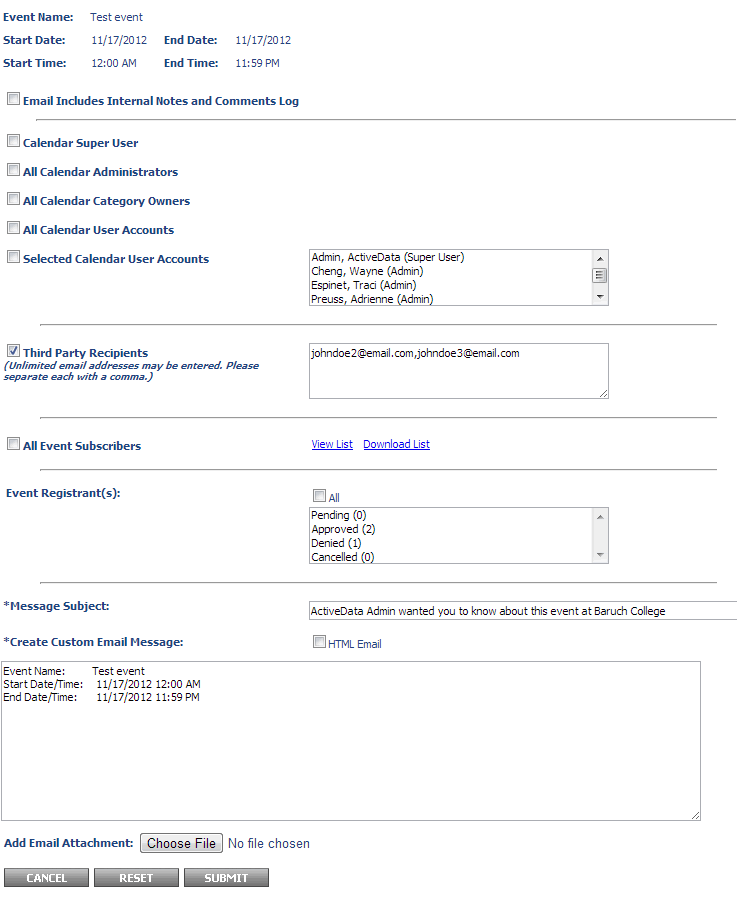
- You should see the registrants' emails in the textbox labeled "Third Party Recipients". You may add additional email addresses if you wish.
- Fill out the "Message Subject" and the body labeled "Create Custom Email Message". When you're ready to send the email to your registrants, click "Submit". The next screen will show you a preview of your message. You can click "Submit" again to send the email.
Creating a link to a specific event for distribution
If you wish to send a link to users to a specific event, please follow the steps below:
- Go to the Baruch Calendar (http://wwww.baruch.cuny.edu/calendar )
- Find your event on the calendar and click on it. You should see the screen below after doing so.
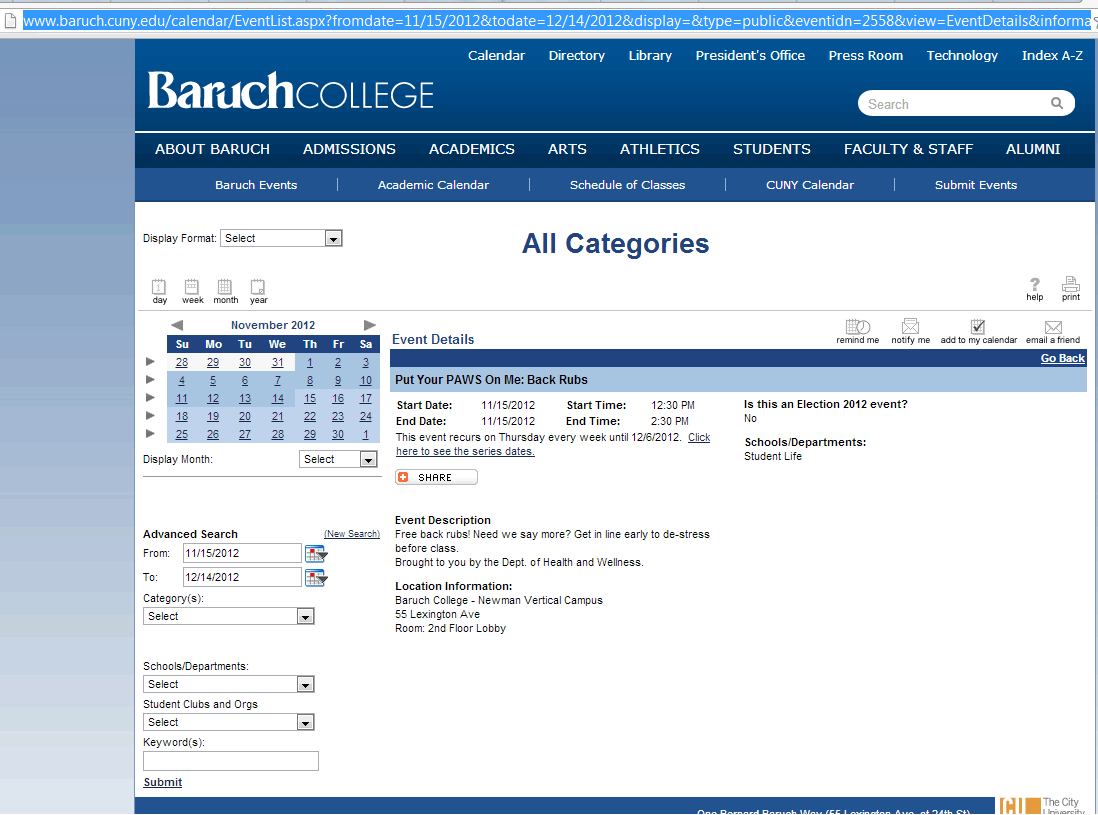
- In the address bar (highlighted in blue at the top of the image), copy this URL/address. This is the link that you can distribute to users to see your event specifically in the calendar.
Creating a link to a set of events for distribution
If you wish to create a link to a set of events to distribute to users, such as all of your open houses, please follow the steps below.
- In the calendar service, click "Marketing" tab
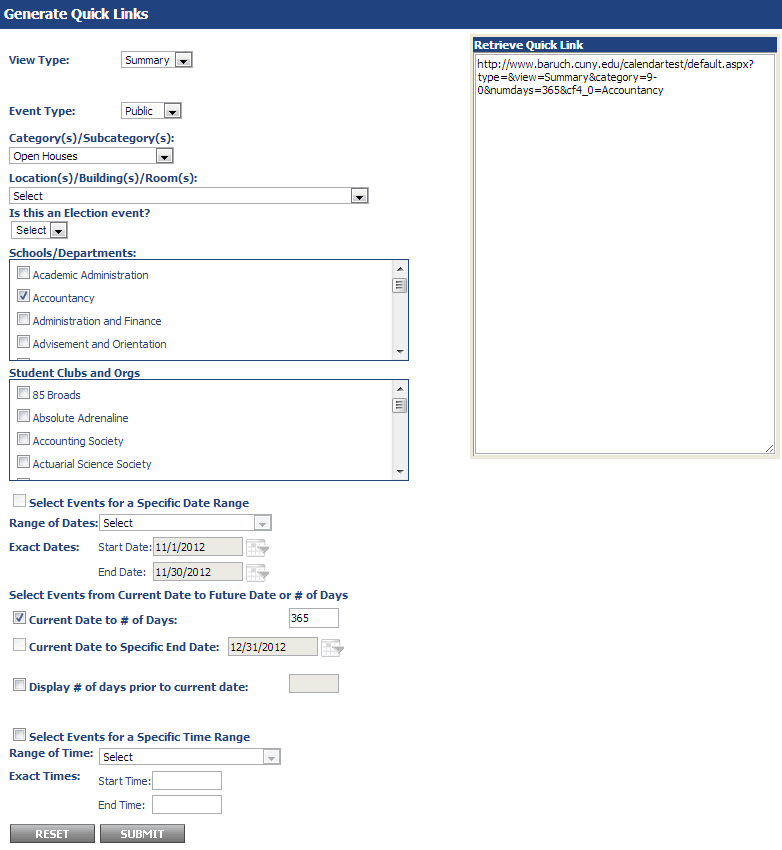
- Click "Generate: Quick Link". You will see the screen below.
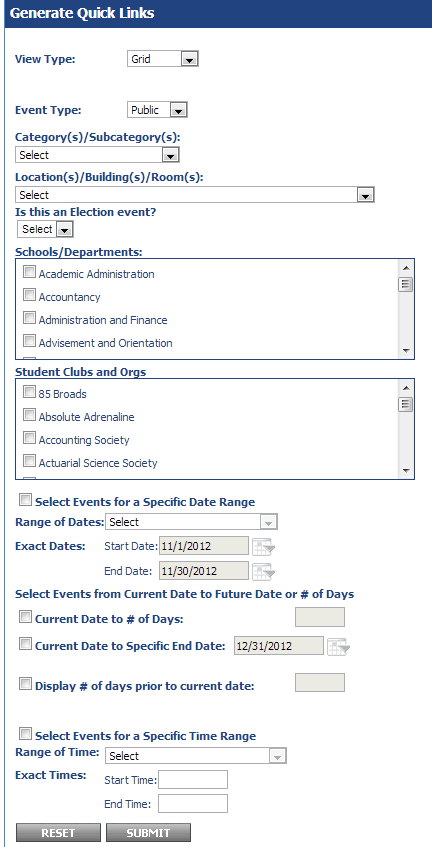
- Let's go over the view type which controls how your set of events will be displayed in the calendar. Options detailed below. It's recommended that you use "Summary" as the view type, but you can choose from one below.
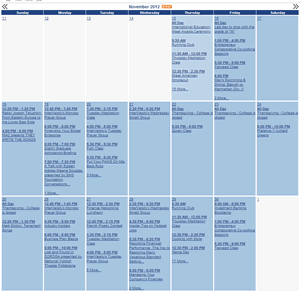
- Grid - Shows events in a grid
- Category - Shows events in a list, organized in sets by category
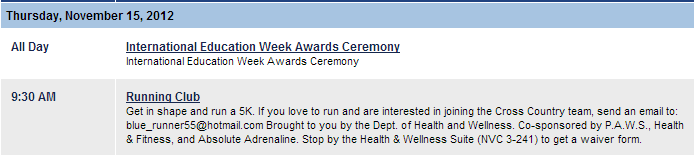
- DateTime - Shows events in a list, organized in sets by Date/Time – Similar to Summary view, but shows some description text of the event and the time is listed in the left-column
- Location - Shows events in a list, organized in sets by location

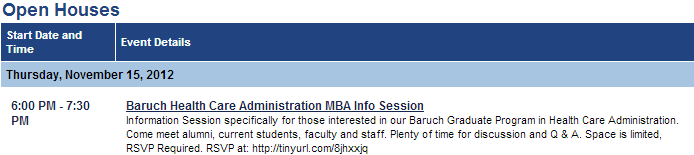
- Summary - Show events in a list, organized in sets by Date/Time - Similar to DateTime, but shows minimal information for the event (Image of Event (if any), Event Title, Start-End Time, Location)

- Gantt - Shows events in a gantt chart
- Grid - Shows events in a grid
- Look through the other options to find out the settings you want. For example, if we want to only show events for Open House events from the Accountancy department from the current day up to next year, we would do the following:
- Category(s)/Subcategory(s) - Select "Open Houses"
- Schools/Departments - Select "Accountancy"
- Check off "Current Date to # of Days" and type in 365
- When you are done, click "Submit". Scroll up and you will see a new window labeled "Retrieve Quick Link". Copy this link, this will be the link you distribute to the users.