...
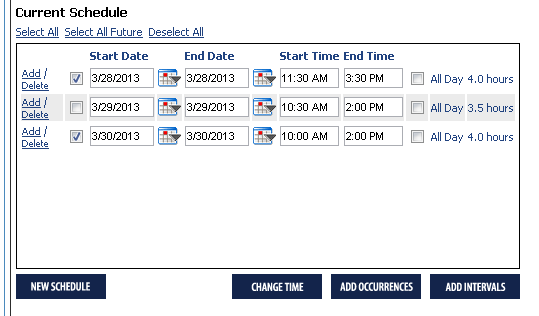
- If you've picked "Select Event Date(s) to find available Facilities", check off the event date(s) you wish to book a room for under "Current Schedule". Note that you may only book the same set of rooms for the selected dates so if you have three dates in three different rooms, you will go through this process three times.
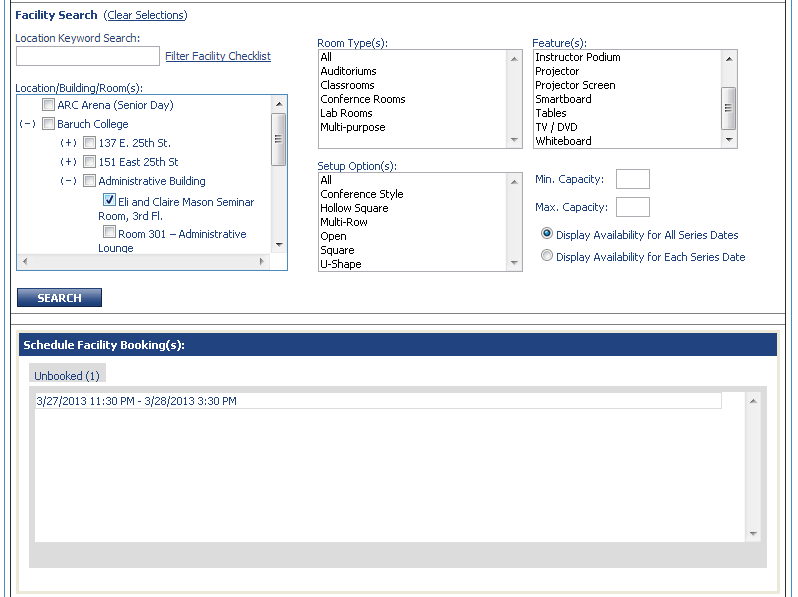
- Once you've selected your event date(s), scroll down and you will see the facility search and some other options (room type, features, setup). Ignore these other options and select a room as you would've in the previously in the Calendar service.
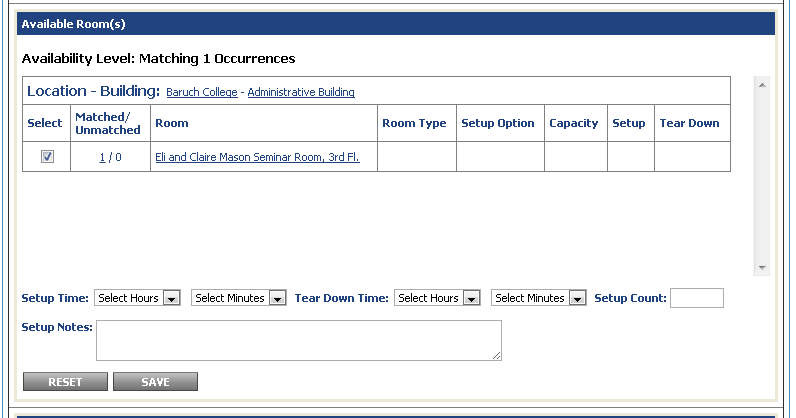
You can either type in a particular facility you wish to reserve in the Location Keyword Search ("14-250") and click "Filter Facility Checklist" or check off the rooms you wish to search and then click the blue "Search" button. If you are not sure which room you wish to book, you can check off "Baruch College" and click the blue "Search" button to see a full list of all rooms available. - Once you've selected a room, click "Search". You will then see a new area called "Available Once you've selected a room, click "Search". You will then see a new area called "Available Room(s)". Click the checkbox under "Select" for the room and click "Save"".
Some rooms may have setup options that describe how you wish for the room to be arranged. Some rooms may also have setup and tear down times. If the room is a Conference Services owned room, please do not modify these times. For non Conference Services owned rooms, the setup time is how much earlier you need to be in the room to prepare and the tear down is how much later you need to be in the room to clean up.
IMPORTANT - If you receive an error after searching the room that states, "There are no rooms that match your search criteria or can be scheduled for this event." Please make sure that someone has not already entered the event you wish to add into the Calendar system. You can do this by looking at the public calendar http://www.baruch.cuny.edu/calendar for the event date and time. If there is no such event, please make sure you have authorization to use this room. If you do, please contact help desk and we will look into this.
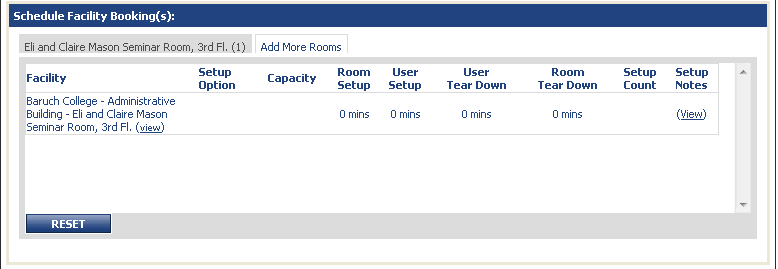
- You should see the room now listed in the "Schedule Facility Booking(s)" area. This means the room is now attached to your event and you can proceed to the "Details & Registration" tab to finalize your event.
You can also remove the room in this area by clicking the tab with the room name you wish to remove and then clicking "RESET". - Repeat this process for any other event date(s) that may need a room.
- To confirm that all event date(s) have rooms associated with them, scroll down to the "Schedule Facility Booking(s)" area. If you see a tab labeled "Unbooked", the number in the parentheses indicates how many event dates do not have a room. If you hover over this tab, it will display the event date that does not have a room.
- Once you've confirmed that your event date(s) are properly booked, proceed to the "Details & Registration" tab to finalize your event details.
...
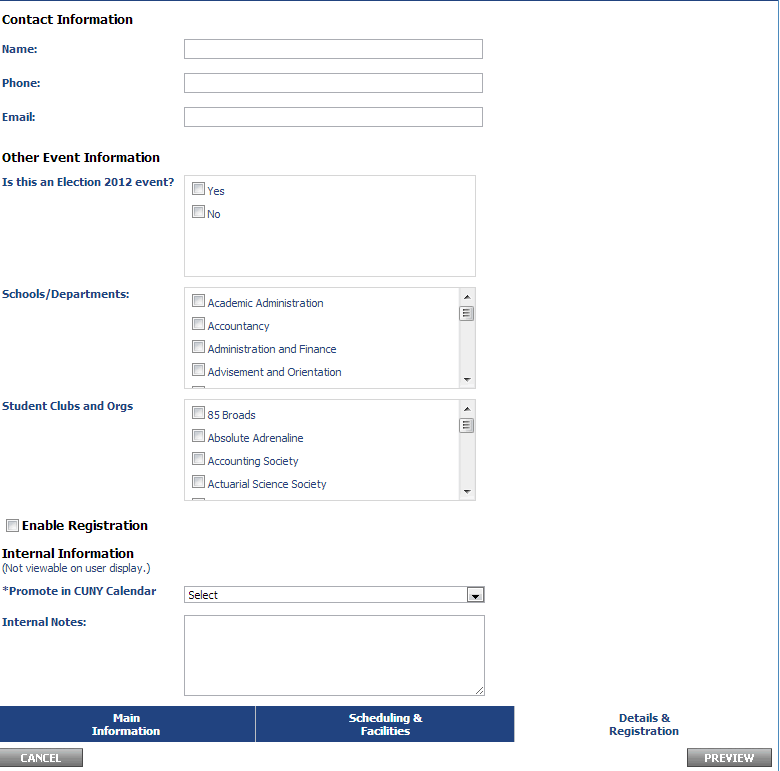
- Fill out the contact information. For the other three boxes under "Other Event Information", check them off if it is appropriate for your event. For example, if it is a school or department event, check off the school or department that is holding it. If you do not find your school or department in the list, please send a request to the BCTC Help Desk to have this added.
- If you would like your event listed in the CUNY Calendar (http://events.cuny.edu/ ), select "Yes. Make this event visible in the CUNY Calendar" for the "Promote in CUNY Calendar" box.
If your event is in a private category, select "No. Do not make this event visible in the CUNY Calendar" as private events are not published to the CUNY calendar. - Click "Preview"
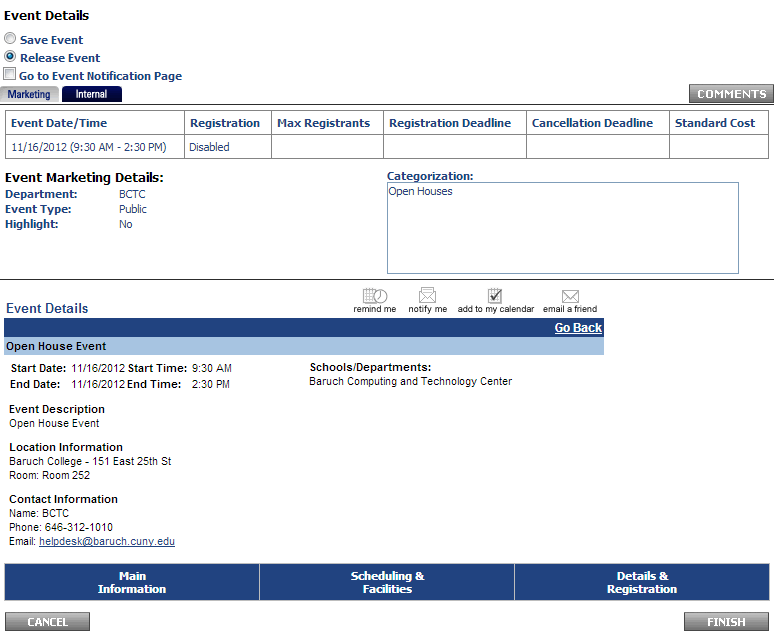
- On the preview screen you can opt to save the event or release the event. If you save the event, it will not be published to the calendar and will only be viewable in your account. If you release the event, it will go into the calendar. The event details area shows a preview of what your event looks like in the calendar.
- Select save or release event and then click "Finish".
- You have now successfully added an event to the calendar.
IMPORTANT - If your event is booked for a facility that you are not the Space Manager of, the event will not be published into the Calendar until the facility request has been approved.
For more information regarding this workflow, please visit the Active Data Calendar Space Reservation Workflow guide.
Modify/cancel/delete an existing event
If you wish to modify, cancel, or delete an existing event, you may do so by following these instructions.
- In the calendar service, click the "Events" tab
- Click "Events: Modify/Cancel/Delete".
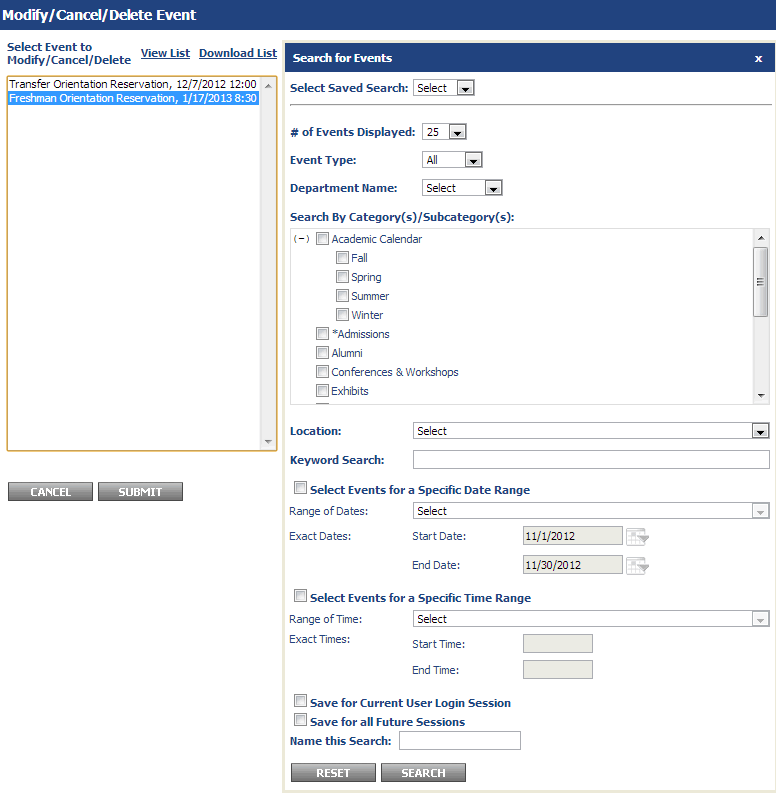
- Select the event from the left-hand list and click "Submit". If you do not see the event, use the keyword search on the right if you know the event name.
Other useful search options:
Select Events for a Specific Date Range - You can specify the start/end date to show events during this time period.
Save for Current User Login Session - If you expect to modify the same set of events during your current session within the Calendar, saving this will prevent you from having to search for it again for the duration of the session.
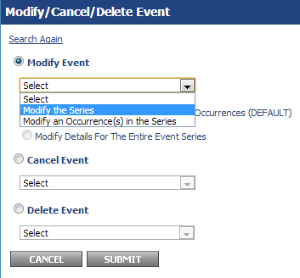
Save for all Future Session - If you expect to use this search again in the future, you can save the search by selecting this option and putting in a name for the search. In the future, you can access the same search by using the drop-down menu by "Select Saved Search". - If you have more than one occurrence in your event (more than one event date), you will see the screen below. You can modify the series or an individual occurrence of the event. When you've selected which set you'd like to modify, click "Submit".
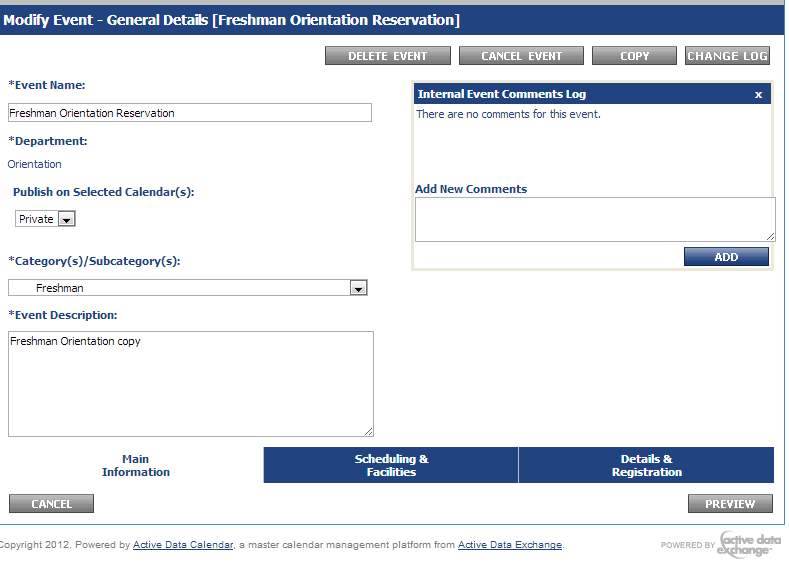
- Modifying the event is similar to adding an event. You can proceed through the tabs and make edits where needed. If you wish to delete or cancel an event, you can select these options on the first tab shown in the image below. When you're done with your edits, just click "Preview" and you can save or release the event.
Modifying Events with Registration / Active Registrants
Please follow these instructions if you wish to modify an event that accepts RSVPs on the calendar.
Please note that it is not possible to change the event date, start time, or end time when you have people registered for your event. If you only wish to change the time of the event, it is recommended the registrants are emailed with the new time and the new time can be noted in the event description.
...
