...
- In the calendar service, click the "Registration" tab
- Click "Registrants: Active". You will see the screen below.

Download CSV Export for Event
- Follow steps for "Managing Registrants" above
- If you wish to get a CSV export with the registrants, click "Download" on the right side of the screen for the event.
Increase Maximum Registrants for Event
- Follow steps for "Managing Registrants" above
- If you click the link with the number of maximum registrants, this will allow you to increase registrants for this event.
Approve / Deny / Cancel Registrants from Event
- Follow steps for "Managing Registrants" above
- If you click the link with the number of pending, approved, denied, or cancelled registrants, this will show you a list of registrants with the specified status for that event. This screen is shown below.
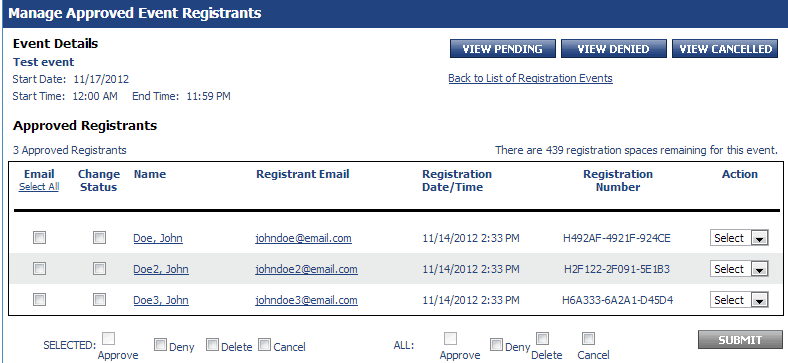
- To change the status of only one registrant, click the drop-down menu under "Action" for the individual's row and select an action (approve/deny/delete/cancel). After selecting the action, the calendar service will automatically perform the given action.
- To change the status for multiple individuals, but not all, check the "Change Status" checkbox next to their name. Then click the action (approve/deny/delete/cancel) next to "SELECTED:". Click "Submit".
- To change the status for all listed, click the action (approve/deny/delete/cancel) next to "ALL:". Click "Submit".
Email Registrants from Event
- Follow steps for "Managing Registrants" above
- If you click the link with the number of pending, approved, denied, or cancelled registrants, this will show you a list of registrants with the specified status for that event. This screen is shown below.
- To email registrants, either click "Select all" if you wish to email all registrants or click the individual's checkbox under "Email". Click "Submit". The email screen is shown below.
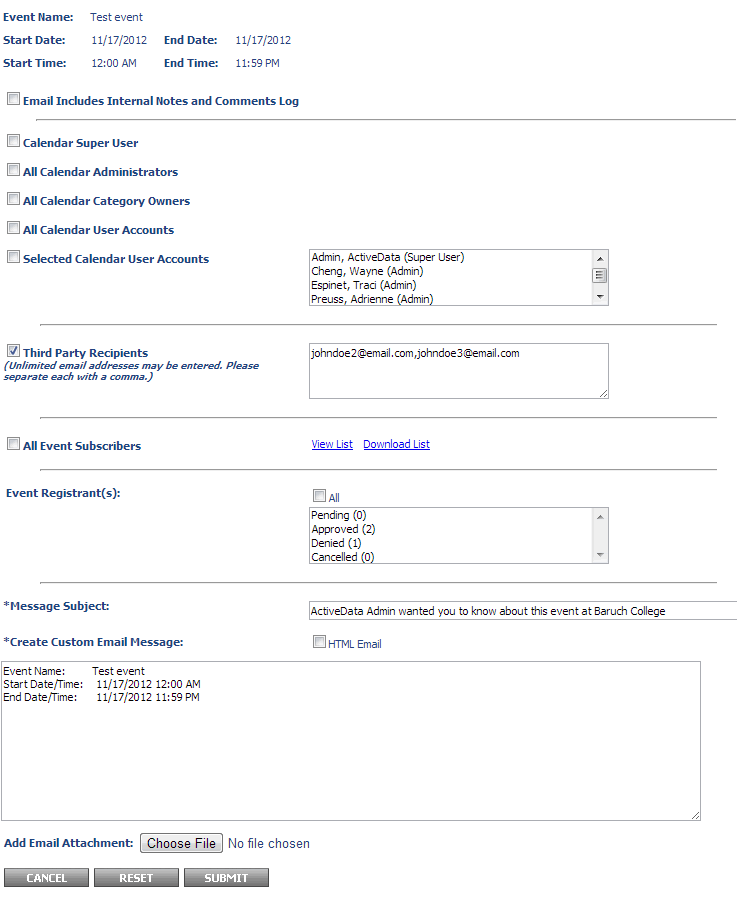
- You should see the registrants' emails in the textbox labeled "Third Party Recipients". You may add additional email addresses if you wish.
- Fill out the "Message Subject" and the body labeled "Create Custom Email Message". When you're ready to send the email to your registrants, click "Submit". The next screen will show you a preview of your message. You can click "Submit" again to send the email.
...